

One of the main reasons that I started sewing was to make harnesses for Sammy, so it means a lot to me to post this tutorial. Here is my tutorial to make a basic harness vest. I’ve included the patterns that I use for Sammy and Loki, which you can enlarge or reduce as you wish until you have the perfect template for your dog.
Sammy is a fantastic little model, since she looks great in anything.
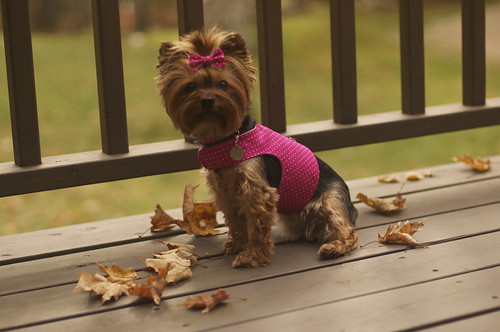
Now your little one can look great too!
Hi Erin,
I have to say, your Yorkie is the cutest thing. I too have a little one myself except mine is really small (2.5 lbs.)
Anyways, wondering if you can teach a tutorial on how to make a dress harness. Your tutorial for the harness was GREAT! Crossing my fingers we can learn how to make dress harnesses too.
Keep us posted!
~Susan
Hi Susan! Thank you so much! Yorkies are awesome.
I got your other note on the skirt. Sammy doesn’t wear too many skirts (she would rather roll in worms than wear a dress) but I’m sure she would model for me if I need her to. Let me see if I can explain it.
Since I don’t have a serger, or a ruffler, what I do is take two long rectangles (2-3 times as wide as you want the skirt to be) and sew them right sides together along the two short sides and one long side. Turn this right side out and press well. Then gather the raw edge using one of many great ruffle tutorials out there.
Then I would sew the ruffle raw-edges together to the outside piece of the harness – along the bottom edge (before you assemble the harness). So with the harness outside piece with the bottom towards you (like in all the pictures), the ruffle would be upside down. Baste that into place, THEN cover with the lining (right sides together) and finish the harness. The only change i would make is to leave the opening on the top of the chest strap rather than the bottom, so that you won’t be hand sewing near the ruffle. Now, I say “ruffle” but you could make it a skirt as long as you want.
You could also use box pleats! Which would be really cute! Think cheerleader outfit!
I also got your tie question – I’ll answer that over on the tie post!
Let me know how it goes, or if I can explain anything more clearly!
Hi Erin,
Tom Boy or not she is still so darn cute! I love her cute face, what a baby face. I was hoping my Sophie was going to stay dark like yours but she went from being black and very little brown as a puppy to a lot of black and silver on the body and very silver and some brown on her face. She’s really cute too. Still a puppy so lets see if the color still continues to change.
Thanks so much for explaining how to add the ruffle part of the skit. I’ll have to give it a try. Let me know if you ever decide to do a ruffle skirt tutorial with pictures. I’ll sure even though explaining helped, pictures will help much much more.
Thanks again!
http://www.MySpoiledDoggie.com
Hi Erin –
a couple of nights ago I found your tutorials for the little dog harness as well as the time for little dogs – I was able to view them a couple of nights ago and last night as well as this morning I could not open them without an error on my computer – is it possible for you to email them too me – I would really like to make them for my little friend chico – he is such a little gentleman – :0)
Let me know if you can send them thanks – have enjoyed your blog :0) :0) :0) :0) :0)
Maria
Thank you for this tutorial ! My yorkies have more clothes than me but I do need a pattern just in case I decide to make one myself. With the long silk coats, velcro isn’t an option because it damages the hair so I’m trying to figure out a design using buttons or snaps. Your furbabies are adorable !
OMG! Your Yorkie is so cute! I have a yorkie too, and I’ve been wanting to make a harness for a while now… I think I’m going to give this tutorial a try! Thank you for sharing and so glad you were featured on Craft Gossip! :) Congrats!
Thank you! Somehow they know how cute they are. As soon as they hear the camera click they come running! Please send me a link if any of you try it! I can’t wait to see all the other cuties out there!
Hi!
I want to let you know I made some of these harnesses for a neighbor of mine for her 16 pound dog and it works perfect and looks super sleek on him. I also made the smaller one for my 10 pound cat. My apt. manager said I have to have my cat on a leash in order for him to be outside. Yeah I know crazy right! Anyway my can loves it and it is not easy for him to get out of nor does he try. They both look very nice. I have pictures if you want to e-mail me, I will put them on my blog with a link back to yours if you like. I love your harness they are just adorable.
Michelle
I googled dog harness pattern and came across your wonderful tutorial and pattern. Thank you! Your instructions are awesome and the pattern is perfect. I added a little bit of length because I was making it for a dachshund and I love the way that it looks. :-)
Barbara
[…] sewing, and giving directions so others can sew her great projects. One of her projects is a “Little Dog Harness.” (I’m linking to the tutorial for the harness, but be sure to look around her site at […]
Thank you very much for sharing this tutorial. My son just took in two abandoned pups and they were too small for the x-sm harnesses that we bought. I printed your small pattern out at 75% and it worked out perfectly. My son was so happy that he requested a second set of harnesses. For the little boy named Batman, I made a little Batman costume, and for the little girl Sasha I added a bow and ruffle. https://www.houseofstirfry.com/chia/blog/2011/07/08/party-clothes/
Hey Erin!! I will have to try this!! I was wondering if you can have a tutorial on how to make fleece blankets with ties on the edges??
Also a fleece twist tug-o-war toy?
Thanks!!
Hi Jen, I’ve made both of these in the past but my recent stuff has been focused on sewing. The tug-o-war toys are easy, the trick is you have to cut the fleece parallel to the selvedge so that it doesn’t get all stretched out. This means you have to buy a large cut of fabric. I think made them out of a 1 yard length. If you want to make them with different colors, then you need to buy 1 yard of each color. When I made them, I made TONS and gave a bunch to my trainer. They held up well at doggie daycare. I will add a tutorial for these to my list. The tie blankets really don’t need a tutorial. You just cut two pieces the same size and cut fringe 1″ apart (again with the two pieces layered), then tie all the fringe together. The trick for these is to have really sharp scissors!
Thanks for visiting!
[…] made Sammy a new collar and harness (my harness tutorial is here). I found this cute turquoise fabric with purple dots at Jo-Ann Fabrics – it's one of their […]
These dog harnesses that have been sewn are very cute. Your yorkie is very cute as well!
Erin,
Thanks so much for sharing your wonderful pattern. I made this for my little girl Emma and it is great. She’s likes it much better (so do I) than the lease type harness I’ve been using. Thanks again for the wonderful pattern and the easy to follow instructions. : )
Nicki
Thank you for this tutorial!!! I really want to make those for my dogs ^^
[…] online but here's a link to my favorite instructions, took me about an hour to make the first time. Little Dog Harness Tutorial | Dog Under My Desk Kizzie's only 3.2lbs now at 7mos, I have a tiny step in one made for cats but it's still a little […]
Great patterns and tutorials & most importantly great name ..
OH MY GOSH I AM IN LOVE WITH YOU LOL! I have wanting to make a little harness for my bunny rabbit, wallace, but have not known how to start. This is pretty much the exact pattern you see the mesh rabbit harnesses. I’m going to make this but add two buckles in where the velcro is. THANKS SO MUCH FOR BEING SOOO DETAILED. you made my day!
Aww, I can’t wait to see this on a bunny!!
Hi Erin, your site is wonderful and you are very talented and generous! Thanks for sharing. I have made 4, yes 4 of these wonderful harnesses, two for my Maltese Shitsu, Charlie, one for her amazingly cute ‘cousin’ Lily and one for her Westie boyfriend, Hamish. People are commenting on how lovely they are and the fur-children are thrilled too!
https://withallgoodintentions.blogspot.com/2012/01/i-love-internet.html
Hopefully, this link works, it is a photo of my girl Charlie in her flash new harness.
She’s adorable!!
Thank you so much for this pattern I love it easy to understand and I only had to make a small modification for my cat yes I said cat. But it works really well and it has made it really easy to teach him how to walk on a lead now I can take him outside to enjoy the great out doors. THANK YOU!!!
That’s great! All furry friends are welcome here :)
Hi, I have a 10 lb Yorkie who has a STRONG prey drive so when we walk she will take off after whatever she see’s and pull with great force for such a small dog my ? is the velcro going to hold up to that without pulling apart I would lose her for sure if it did and I live on a busy street LOVE the harness
Nancy – What I can tell you from my experience. Loki is 12 pounds and I’ve never had a velcro harness burst open on him. I always use the 2″ wide VELCRO brand and use a large piece of it. Try putting it on her and lifting her up and see if it holds. :)
If you are worried, and I understand if you are, then you could use snap clips instead of velcro, or over the velcro. A few people have done it, like this one here: https://fudgebuckets.blogspot.com/2011/08/new-sewing-project.html
I hope that helps! My other suggestion is a nice step-in harness. I like Premier products the best :)
First I’ll say that I don’t/never-have sewn…anything. But now I have a 2 lb Chorkie and he needed a halter. Found you just internet surfing, and your clear instructions are why I chose your pattern. (Bless your heart!) It’s pretty easy, mostly; I’m just not familiar with the fusible web product.
I have one question. When does the paper on the fusible web come off of the outside fabric?
I’m ready to sew the strip with the D ring to the outside fabric, but I can’t picture how it will work with the lining fabric & the fusible web stuff in regard to turning it all inside out later. ??
I will try to reach a ‘sewing’ friend today, since I really want to get this on Bear,
but I’d love to hear the answer from the Source, if you will.
Thanks for your help and for posting this pattern.
Hi Kate!
The only place the fusible web (2 sided sticky) is used is attaching the strip w/ the D-rings. Otherwise you should just be using regular fusible interfacing (1 sided sticky, I use Pellon SF-101). Is this possibly where you are getting confused? I’ll email you for more details :)
Thanks, Erin. Yes. That’s the problem; I used the same f.w. for both areas. And of course, I found that the item wouldn’t really move under the pressure foot. I solved that problem by using a thin tissue as a cover to that f.w. product, then just peeling it off before I turned the seams inside. I’ve ended up with the two fabric layers fused together, but that doesn’t seem too tragic to me.
I have only to sew on the velcro now, but something is wrong with tension somewhere; the underside (bobbin side) is a mess. But a friend is coming over later today to teach me about that. Thankfully!
I think my faint memories of my only sewing class (in the 60’s!) have taken me about as far as they will. I’m unlikely to try sewing another one, but I really only need to have something Bear can wear until he fits a better one. And I have accomplished that. The fabric is cute, the puppy is the most adorable EVER (except Sammy, of course!), and the harness will work. As for the rest, well, laughing at myself is a good exercise for the heart. All is good. When Bear is finally wearing his new harness, I’ll post a picture. But no Close-Ups! :)
Thanks for your help with this project. Bear won’t like it at first, but he will be dashing in his new clothes. LOL
If you are having bobbin issues and you have already re-threaded the top and bottom thread, try changing the needle. It might solve your problem :)
[…] Here is a free pattern I found too: https://dogundermydesk.com/2010/11/little-dog-harness-tutorial/ Google 'free dog clothing pattern' too! There are tons out there for free. Hope this helps! Good […]
OH this is just what I´v been looking for – a good pattern for a little dog´s harness – but then your link doe´s not work :( can you send me a new link or has this been locked ?
[…] went with a free pattern provided by a blog called Dog Under My Desk. There are two patterns provided, and I used the larger one since Wilson is 14 […]
Hi,
Thank you so much for the tutorial. I have a new morkie. He is going to be more like the yorkie side.Tory is 15 weeks old…hates any collar, and the harness we bought ….he manages to get it in his mouth! I downloaded this pattern of yours and was wondering would this be appropriate for him. He is about 2 pounds….no more. Do I just adapt down or would this be something I would need to wait on? Tory is ourfirst inside dog, and our first small dog.
Thank you,
Gina
[…] Patterns: Dog vest harness patterns Dog Harness Vest : Decorating : Home & Garden Television Little Dog Harness Tutorial – Dog Under My Desk :: Dog Under My Desk How to Make Custom Dog Clothing : Decorating : Home & Garden Television __________________ […]
This is great! I’ll probably be making one for my kitten. This seems much more comfortable than just simple straps. Thank you! ~Kelly
Thanks so much for posting this…we have three dachshunds and I’m looking forward to making them some.
You are welcome! Those little guys are so hard to fit sometimes. Let me know how it turns out!! :D
[…] Small Dog Harness […]
Thank you for posting this. My daughter (also named Erin) and I have been and tried on loads of harnesses for our Yorkie today and nothing fits, so going to try this as soon as I get some material. :) Your little girl is so cute.
Those silly Yorkies. Did you end up making one?
This is such a great and easy pattern, thanks so much for sharing it! I made one for our little MaltiPoo, Lulu. Now several of my friends want me to make one for their dog too!
I used your Loki pattern and it fit Lulu just great – I plan on making lots more for her after I make some for my friends.
Aww that’s great! You are all overachievers… my dogs need new harnesses. ;)
Thank you so much for this! I made two and they came out great. Had to scale them down some for my Chihuahua puppy!
Thank you! I cut the 13.5″ harness down for my boston terrier puppy and am blogging about it now!
[…] about the hijack! Thanks @Rain! I found directions for a very similar one at: Little Dog Harness Tutorial :: Dog Under My Desk (if anyone is interested)–looks pretty easy. I talked with my sister, who likes doing those […]
Hi! I have an etsy shop where I make collars and leashes and adding small dog harness. I am making the k shape, also, but it is only 3/4 inch in width. I am starting with making my pup one for practice. He is a shih-poo and weighs 8 lbs. His girth measured 15 inches and neck was 12 inches. I am trying to get the right sizing for cutting my fabric for the neck. If you go to my website you can see what the harnesses look like, or email me for a picture. I have the girth measurement right, but the neck seems to still be a little big. How many inches should I add to the neck measurement? I found another person that made them and they said they only need the girth, not the neck measurement…. I just want to get this right. I slowly keep cutting down my own pup’s harness for the neck until I get it right, but is there an easier way… I hope all of this makes sense…
[…] Remy's because I bought one xxs that is still to big for him. I got my pattern from this website. Little Dog Harness Tutorial :: Dog Under My Desk I have a picture below of Remy when he was about 6 mths old in his cheetah harness that I made for […]
Thought I saw this one first….love your patter …….. there is almost the same vest on another site I prefer yours tho
Im making it for my terrier Katie She was so badly abused when I got her but has come so far in 12 months just wish she would keep her coats on tho when its -3 most morning now
your in summer I guess
oops forgot to sign my name
thanks heaps
Fuzzy …yes that’s my name
I was so very glad to find your website. The only type of harness I could find was either the straps, or a vest-type. I wanted the type that covers the back. I am forever thankful to you.
Thank you for the pattern! My 5 lb. Maltese thanks you, too. She didn’t like the hard one from the store.
Your pattern is easy and quick to make. Love it!
[…] 2015/07/07 – 73% geek Nightshade in his Little Dog Harness […]
Love the looks of your pattern,
I have a 3 lb chihuahua I want
To make one for. Just not sure
How to cut it small enough.
Her neck is only 6″ and 10″ around.
OMG! So cute! Speaking of skirts for a harness vest, I made my grand puppy one for Mardi Gras down here this year. She was the belle of the ball, or should I say parade. I used MG fabric from JoAnns and some left over purple tulle and flat strung sequins. I folded the tulle in half, leaving the lower portion a bit longer than the top. I ran two rows of long stitches at the fold for gathering. Before I pulled the top threads and gathered it, I used a wide zigzag stitch to secure the sequins. Found the center of the lower harness vest and attached it, after it was gathered. My pattern was a little long for the 5 lb princess. (Didn’t check it before I added the ruffled skirt) ((oh well.)) As she walks, and her little rear bounces, she twinkles!!! I added the d ring for a leash and hot glued little beads around the neck of the vest. It was fun to make!
Bonjour et merci pour ce diy.. mais je ne parle pas anglais, et je vais donc essayer de tout comprendre… je ne désespère pas….@bientôt
Hi Erin,
Thank you so much for the cute pattern and tutorial. I’ve enjoyed making several for our toy poodle.
I get so many comments about the cute harness.
Thanks again,
Marti
I wish there was a video. I can not figure out how all the patterns go together. There seems to be to many parts
Hi Lori! There are only three pieces. Which part can’t you figure out?
Your Sammy is a sweetie! I’m sewing for 2 – an 8.5 lb. Pomeranian (Bella) and a 15 lb. Rat Terrier (Tory). Bella is okay in her regular (commercially made) harness, but Tory slips out of her harness as soon as she can.
I’m planning to adjust your pattern to be a bit longer for Tory (so she’ll have more out of which to wiggle – lol). With a little extra length and a warm fabric these might work as winter jacket/harness set-ups. If I can get her to sit still I’ll try to come back and post a picture.
You’ve given me new hope of taking her for nice long walks! Thank you for the pattern and tutorial.
The link to your pattern is dead – will you please email me the PDF? I have a 2 pound toy shi-chi who we can’t find anything to fit!
Thank you so much!
Alicia
Hi! Link is fixed! If you see the most recent post, the shop side of the website has been updated so it may result in broken links that will take some time to fix. All content for the blog and tutorials is now at blog.dogundermydesk.com.
You may need to shrink a bit for a 2 pounder. Good luck!
Hi Erin,
Sammy is adorable! I have a Yorkie too! She is a tomboy just like yours! I thought maybe all Yorkies were all this way?
I didn’t expect it. She is my first small dog and what a character she is! All 5 lbs of her hates wearing clothes and when I’ve tried to get her to wear them, she figures out how to get them off just about as quickly as I got it on her. The only things she doesn’t object to is a sweater if it’s cold and a harness.
Lily loves nothing more than to be outside rolling in the grass. I’m forced to mostly keep her beautiful hair (she is a Parti colored Yorkie) in a puppy cut as she rubs her face and head on rugs or anything soft she can find to rub it on. She looks great coming from the groomer with a cute little bow on her head for about 5 minutes! She doesn’t care if I think it looks adorable! It’s so funny to watch her. I love her to pieces and she is spoiled rotten!
Anyway, thank you for the pattern and the tutorial. I’m going to get to it today. I think I might try adding a ruffle on the bottom and see if she’ll wear it. <3
Thank you! I just made one for my puppy.
[…] Click for more details […]
[…] You need to check out this little dog harness! It looks amazing and cute. The pattern can fit into any reason why you need a harness in the first place as it is customizable. You get to decide the materials you want to use and the size depending on your dog. dogundermydesk […]