This is for Patricia, who has been quietly whispering the T-word to me on a daily basis via Facebook, Twitter and the blog. I tell you all to bug me for the things you *really* want – well, it’s true.
This consumed my entire weekend, so please tell me if you like it!

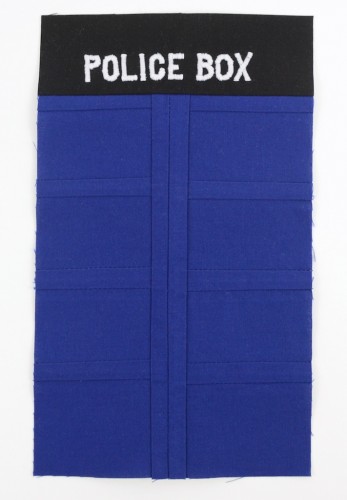
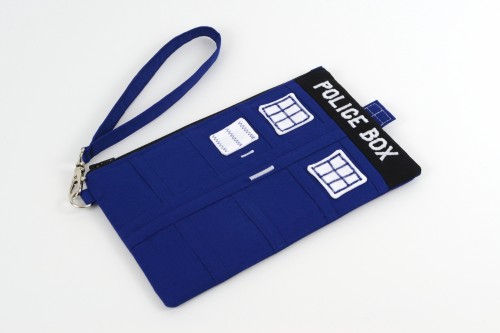
First of all, let me say this: I was careful with my seams and still ended up with a slightly wonky Police Box. That’s kind of part of the charm. So here we go, the wonky Police Box…
Materials: I used about 1/2 yard of Moda Bella Royal (I lined it with the same fabric) and scraps of black and white. You could also use felt for the windows.
Finished size: 8.5″ x 5″
Obviously this is only for the pieced front. To finish off the wristlet, the entire Essential Wristlet PDF Pattern can be found here.
POLICE BOX
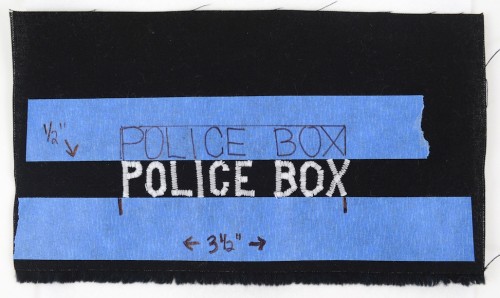
I attempted hand embroidery but had to resort to a tiny free-handed zig-zag. I’ll show you how I did that and then you can come up with a better way to do it if you have the hand embroidery talent or better yet, an actual embroidery machine!
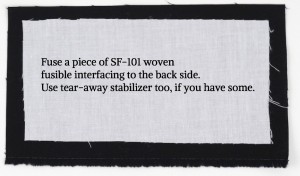
The final size of the black fabric is going to be 2″ x 5.75″, but cut your scrap larger than that – about 4″ tall by 7″ wide. Back it with a piece of SF-101 (you’ll need it to stabilize for the zig-zag stitch) and if you have it, toss a scrap of tear-away embroidery stabilizer back there too.
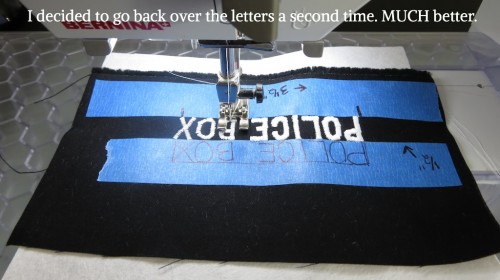
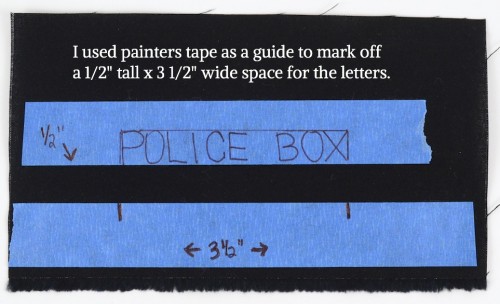 I set my machine to a teeny tiny zig-zag and switched to my applique foot. You’ll need to experiment on scraps but it was set to about 2.8 wide and .4 length. My biggest tips are to *GO SLOW* and *STOP WITH YOUR NEEDLE DOWN* and practice first. I did it on the second try for the first one I made, and this was my first try this time.
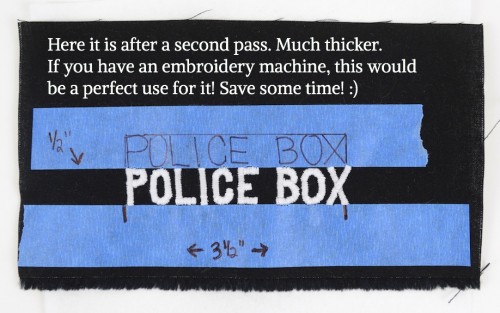
I found that it worked out best to actually go back over the letters a second time, because I was able to fill in any mistakes. The second time I used a slightly a wider, thicker (shorter) satin stitch. This is where the applique foot comes in handy because it has a channel for those fat stitches to fit under.
PIECING THE POLICE BOX
We’re going to use pieces that are slightly longer and wider than we need so that we can square up / trim the final rectangle.
Please rotary cut these… this is just for reference because they are odd sizes to keep track of. If you don’t have a rotary cutter or like torturing yourself by tracing itty bitty pieces, you can download the PDF here. But please don’t. :)
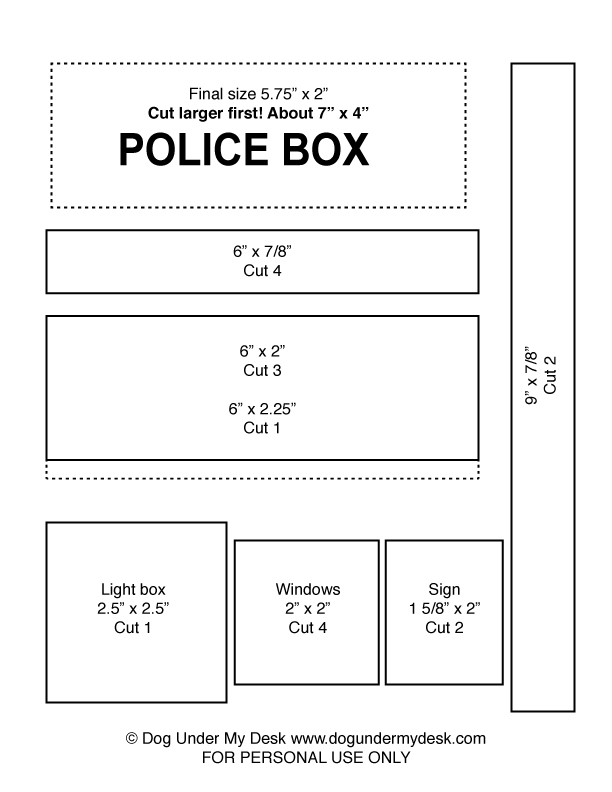
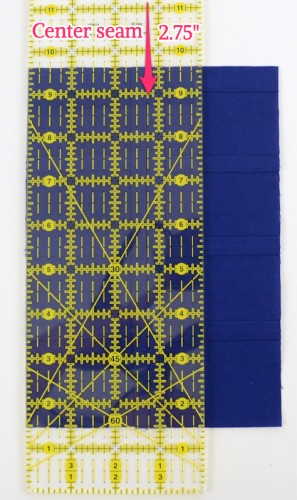
Lay out the 6″ wide pieces as shown, alternating with one of the skinny pieces a the top and the 1/4″ longer piece at the bottom.
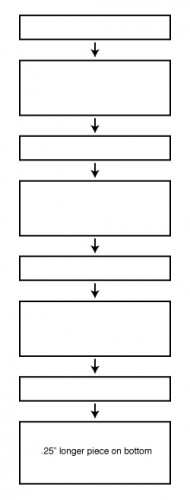
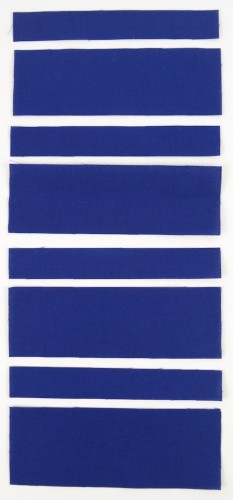
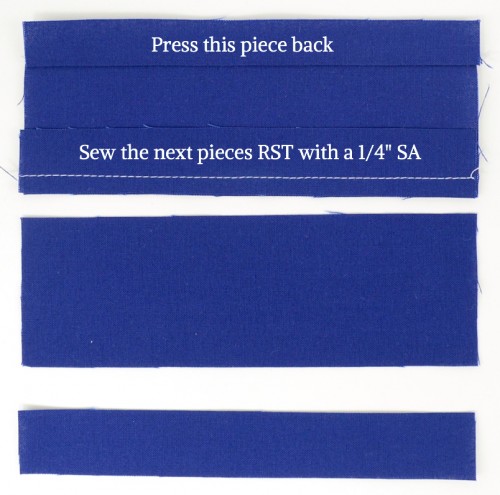
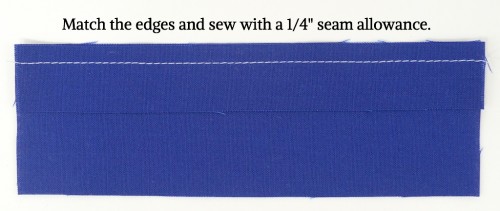
Place each one on top of the other (right sides together, but they’re solids…i know) aligning the edges and sew with a 1/4″ seam allowance. If you have a 1/4″ foot, now is the time to use it!
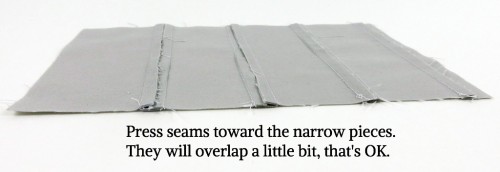
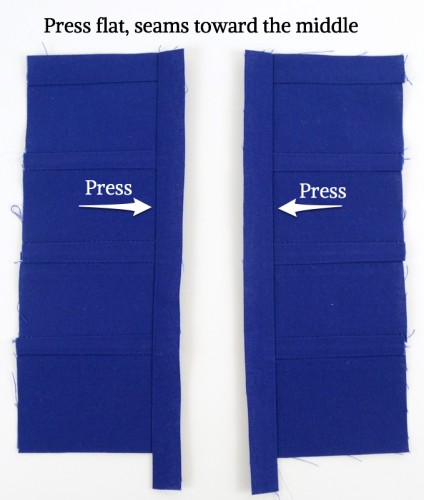
Add each piece all the way down, right sides together with a 1/4″ seam. Press seam allowances toward the narrow pieces as you go.
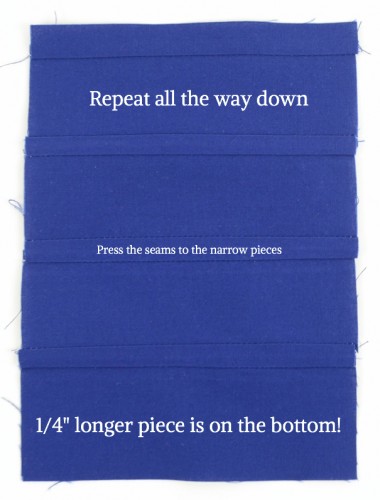
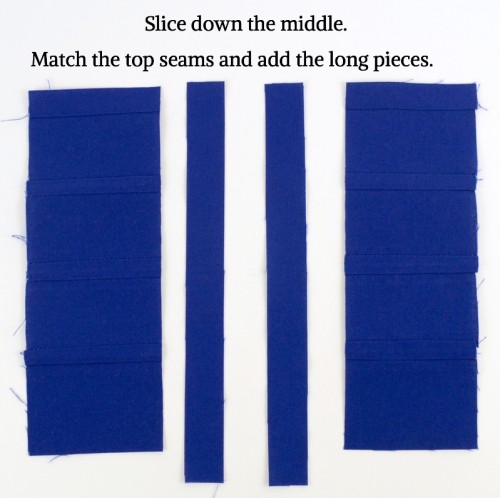
Now – SLICE that finished piece down the middle and then add the 9″ long narrow pieces.
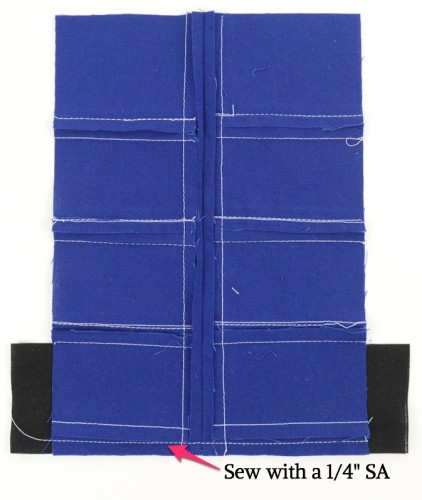
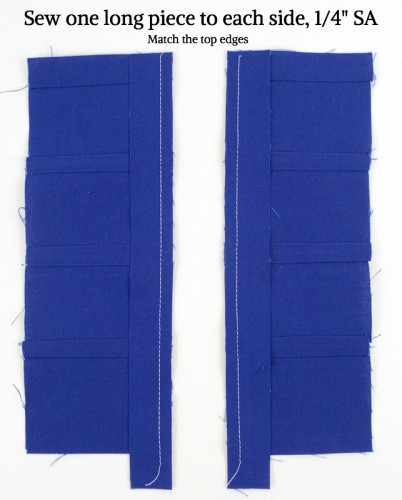
Sew one narrow piece to each side using a 1/4″ seam allowance.
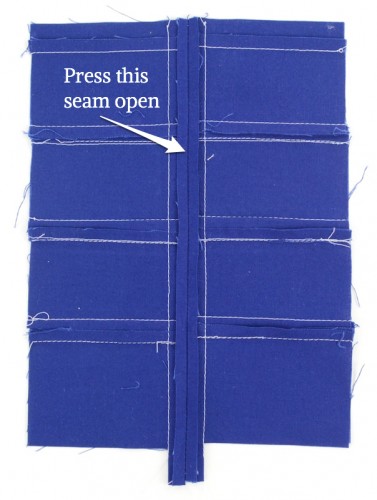
Sew these RST, matching the top and center edges and sew with a 1/4″ SA.
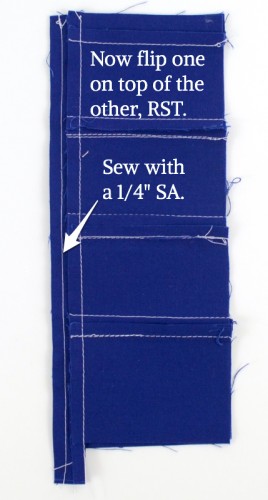 Press open the middle seam. There isn’t anywhere else for it to go. :) (I know, my stitching on this thing is horrible. So you shouldn’t feel bad about yours!)
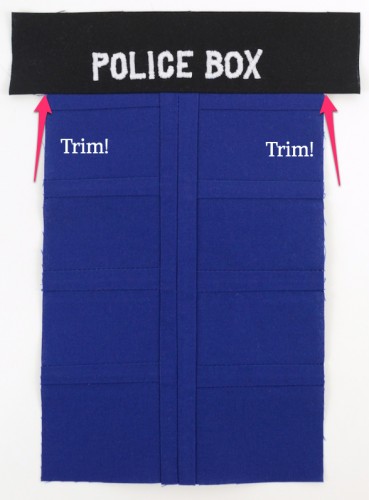
Now we trim. I know this is going to seem a little odd, but what you need to compensate for here is that the bottom seam allowance (the right side) is larger than the left side, which is only 1/4″ because it’s attached to the zipper. So you need to off-set the center a bit so that it actually appears closer to the center in the finished wristlet.
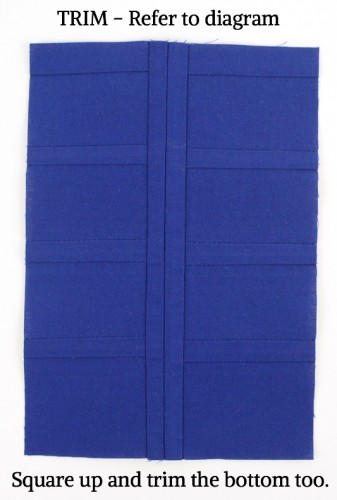
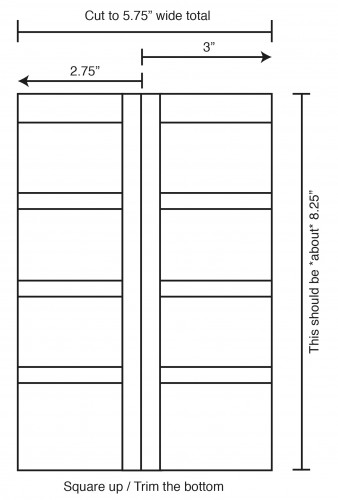
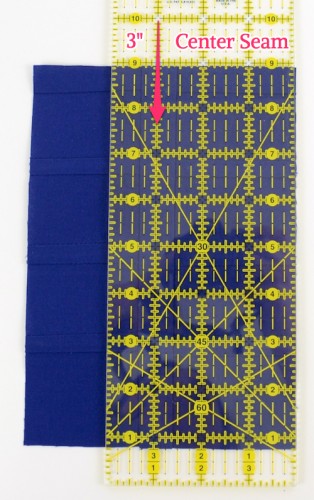
Can I just say, black fabric is linty! Especially with white thread. I keep lint rolling and it’s driving me crazy. Is it just me? OK.
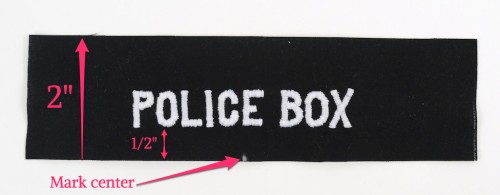
Measure 1/2″ from the bottom of the lettering and trim. Then measure 2″ from the bottom and trim the top.
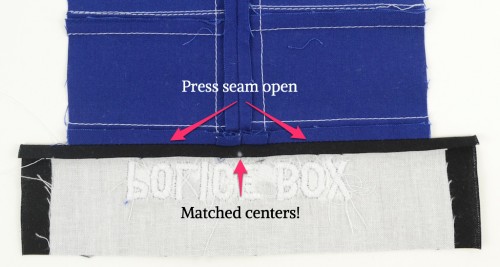
Now the trick is going to be “centering” it but not really centering it, because you want the letters centered on that off-set seam. So, find the center of the lettering and make a tiny mark within the seam allowance. DO NOT trim the sides yet.
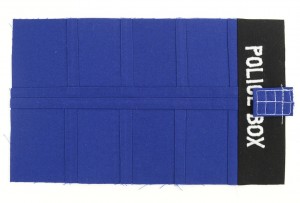
Match that mark to the center seam on the blue fabric. Sew with a 1/4″ seam allowance. Press this seam open.
Cut to size and fuse a piece of SF-101 to the back side. It needs the reinforcement for the windows.
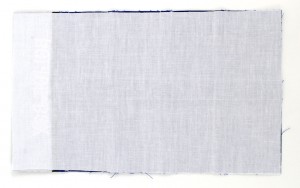
I thought it would be cute to add the little light box to the top. If you want to, cut a piece 2.5″ x 2.5″. Fold in half and sew with a 1/4″ SA on one edge. Press that SA open and turn it right side out, with the seam at the center and press.
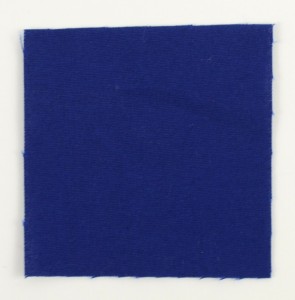
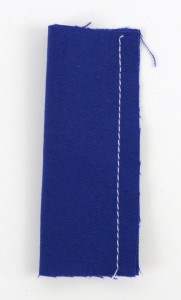
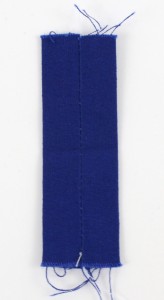
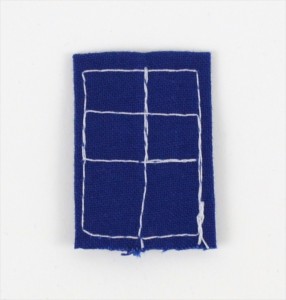
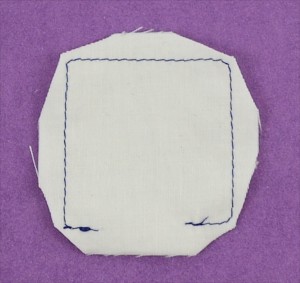
I stitched and turned white fabric because that’s what I had. Stitch 3/8″ around the outside, leaving a opening for turning. (Use white thread… not blue.) Clip, turn & press. (Do yourself a favor and use felt for this… I didn’t have any. These pieces are just so tiny to turn. But, it’s doable – obviously.)
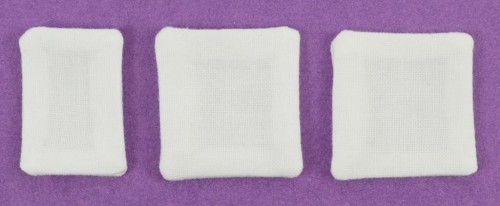
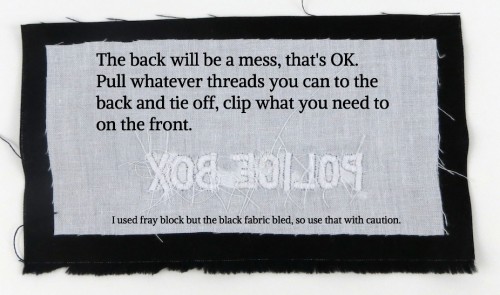
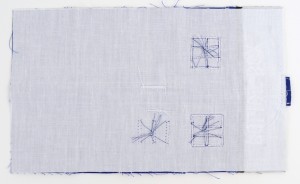
 This is silly but after that disaster on the back side above, I’m pretty happy with this back side. :)
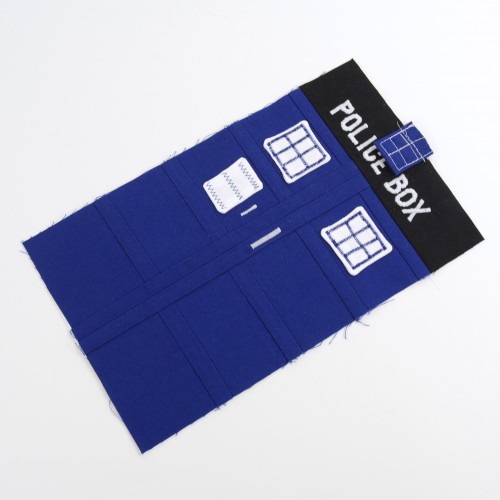
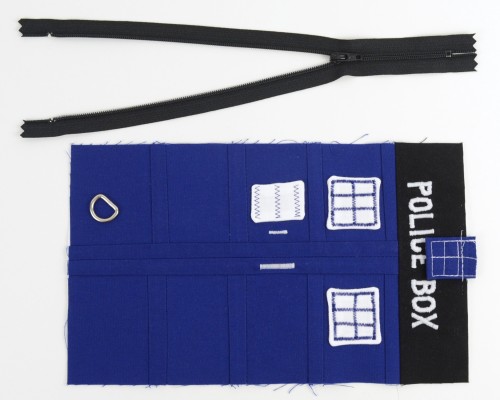
My finished piece ended up being 9.5″ x 5.75″, so I cut the other three pieces the same size and I cut the zip to 8.5″. Make sure the closed/tabbed end of the zipper is on the Police Box side. The D-ring and open end of the zipper goes on the other side.
***Disclaimer: It should go without saying that the this is for personal use only. It’s just for fun. Make them for all of your friends, but please keep them off Etsy. For me. You can make wristlets for sale from my pattern, just not these. Thanks! The TARDIS and anything Doctor Who are clearly owned by the BBC and we thank them for letting the fans have fun with it.***

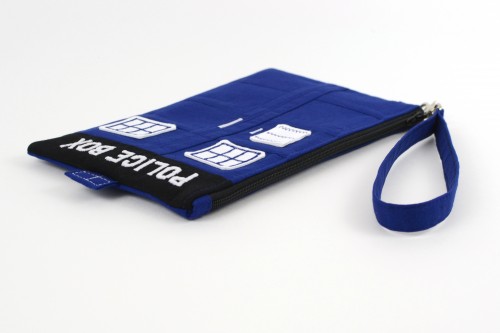
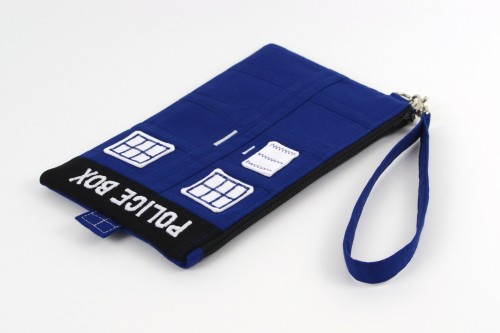
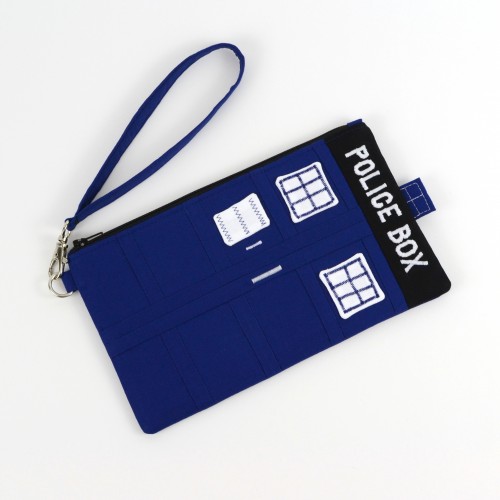
Cool, now you have to make a Dalek to match ;0)
You’re not the only one who said that. Where to even begin?
AHHHHHHHH!!!!!! Thank you so much!!!!!! <3 <3 <3
Oh your excitement makes it so worth it!!!! :D
That is just absolutely wonderful!!!! And coincidentally so timely – we are huge fans of the Doctor…but haven’t been able to watch in awhile since our US networks stopped showing the show – then JUST this weekend I was playing around with our “on demand” feature and realized we COULD watch past episodes…YEY!
Nice! I get it on BBC America but BBCA is probably not on every TV package. There is always a Christmas special, so perfect timing to catch up! :)
Impressive! My niece is a huge Dr. Who fan and I’ve been on the lookout for a perfect gift to make her for Christmas – this wins the prize, so thanks very much for sharing :-)
NICE! Yeah my Doctor Who fan friends are all very excited about it. It might be time to teach a few more friends how to sew… :D
Oh my goodness…this, as my college age daughter is “GENIUS!” I’ll be buying your pattern soon as I intend to make no less than five of these for Christmas!
[…] If you can’t get enough of the 10th doctor (or just a huge Dr. Who fan) then you’ll definitely want to whip up one of these Police Box Wristlets. […]
[…] (via Erin Erickson) […]
Oh my goodness Erin!!!! I sent a friend here to look at the 2 zippered hipster bag just to see if she liked it. Well, long story straight, she love, loves the Police Box!!!!! I should have known (knowing her) that it would catch her eye.
Just dropping you a note that I referenced your TARDIS tutorial in my Christmas sewing blog post! Thanks for the great tute!
https://agirlsgottalive.blogspot.com/2012/12/christmas-sewing-projects.html
Aww! The one that you made is cute!! Thanks for linking to me!
Hey Erin!!!
I finally made the Tardis wristlet. Your tutorial was perfect!!!! I did make some major flaws and will correct with my next Tardis wristlet. My worst mistake was….the zipper came off the tracks and I had to turn the zipper around. The second worst mistake was I didn’t allow enough room on the black felt fro the embroidery “Police Box”. You clearly said to leave enough room!!! Duh….The third mistake I made was using duckcloth. Love the feel and look of duckcloth, but it’s to bulky for this project.
All in all, I’m good with how it turned out and I can’t wait to make the next one. Again, your instructions were perfect!!!
Love your projects!!!!
Ellen
Oh my gosh, I’m so glad you made one! I saw your pictures, so fun! Definitely share once you get it perfected, I can’t wait to see!!
This is neat!!! It’s really fun to make too!!!!!
But,
I cannot embroider by machine, (Don’t have one!!!) :( So If you could make a hand embroidery video to show me how to, I’d be grateful…
THX!!!!!
:D
OK I have to admit your comment made me laugh. I have absolutely no hand embroidery skills. I wish I did. Sorry!
I love this project and I’m going to tackle it very soon. In all of your spare time it would be great if you could convert this to a notebook cover!
I kind of love this and hate this at the same time. I absolutely love it! It’s so totally awesome and perfect and you are totally awesome for sharing this tutorial! But I kind of hate it too because I now have to make one. And once I make one and my friends and family see it, I know I will then have to make a zillion of them, so… ;-)
Aww so sorry. ;) Yes, I understand that problem. Let me help you out. NO. Nooooooo. N.O. NO.
Or do what I do and just say it’s $100. Everything is $100. They stop asking :)
My aunt saw a Vera Bradley iPad cover and said “Oh but you could make me one! How much?” I asked how much the Vera Bradley one was. She said $40. I said, OK, $40. She said “Oh.” and walked away.
Yet the people I like a lot get things made and I won’t let them pay me. MUAAHAHAHAHAHAAAA.
Hehe. Thanks for the advice! That is too funny about your aunt. :-) I had a couple of people in mind when I saw the wristlet and no doubt they will get one. For all the rest, well, I’ll just tell them you told me to say no. ;-)
[…] I happened upon a fantastic tutorial over at Dog Under My Desk. And so I gave it a go. […]
This is so adorable! Love it! I’m off to make one for a very special birthday present… but of course, I have to make one for myself too, as we simply must match… right? Of course right! ;D
Fantastic tutorial!
It’s WONDERFULL!!!
[…] out how Beth Strand took my pieced Police Box tutorial and turned it into a Tardis Mug Rug. I want that Tardis mug […]
I LOVE it!!! It’s EXACTLY what I was looking for for my Dr. Who crazy children (and myself, to be honest!).
Thank you so much for making and sharing this and YES make it into a notebook cover, too!! And the Dalecks!!!!
LOVE IT! I can’t wait to make four of them and see my kids faces :)
This is great, my kids will love it! Thanks for sharing.
This is absolutely amazing. I’m a massive Doctor Who fan (at aged 14). Your tutorial is very detailed and very, very easy to understand. Thank you so much for this tutorial. Would you be able to make a CyberMen or Dalek? they would be amazing.
Just stumbled across your post from the sew mama sew website. if you were in the UK you would be a national heroine, the entire country is waiting with bated breath for the 50th anniversary episode of Dr Who tomorrow night. I am planning to make dalek cup cakes – as you do when Dr Who is in town!!! But if Id seen your tutorial earlier I would have been making the wristlet! Will save this little gem to make in the near future.
Many Thanks for sharing your skills and passion.
Tracie xx
I require pictures of Dalek cupcakes! <3
Thanks!! I’m thrilled you are all finding me. The more geeks the better!! :D
Just found this tutorial too…I am not good at lettering (my sewing machine embroidery sucks!!) so I made myself a jpg image of the words “Police Box” and printed it out on my computer…white lettering on black using an inkjet fabric sheet. I will post the finished wristlet hopefully in a few days.
I am making this for a friend of mine who will go insane when she sees this!!
THAT IS BRILLIANT
Erin, came over to visit your web site from Heather’s Sew Your Stash Challenge. I am so loving this Tardist wristlet. My daughter who is a B-I-G Dr Who fan will have to have one for sure and once her friend sees it she will want one also. Thanks so much for sharing your pattern!
I just made this for my SIL’s bday! Thank you SO much for the wonderful tutorial! One thing I wished I had done differently though was to have the zippers zip up to the top of the police box and have the strap up there as well. I did stick a D-ring on each side in case my SIL wants to turn it into a mini purse and have a long strap. It turned out really well. Thank you, thank you
Coincidentally I found this tutorial while looking for wristlet patterns so I could use up some of my scrap Doctor Who fabric from a purse I made. I can’t wait to try this! I can use the scrap fabric for the lining, too. Thanks for putting this together! I also love your two zipper hipster bag, and may have to buy that pattern and try it later.
[…] this.) I couldn’t make a teeny TARDIS, so you can declare you Doctor Who fandom with a wristlet like this one. I made these the right size for the earbud pouch and easily traceable for you. […]