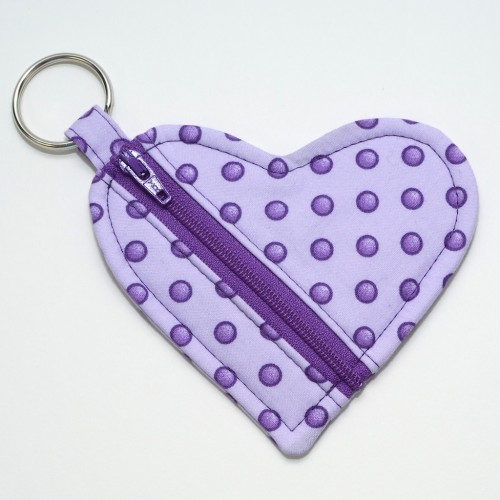
Here is the heart-shaped version of the now-iconic Circle Zip Earbud Pouch! There is also a full PDF Pattern version of the Circle Zip Earbud Pouch with more detailed instructions and clearer photos available.

This is just a mini-tutorial. I have only focused on the parts that are different than the Circle Zip Earbud Pouch, so I have not included every step. Please reference that post for more instructions. This is definitely more tricky than the circle pouch because of the shape, but it only uses little bits of fabric so if you mess one up, no big deal!
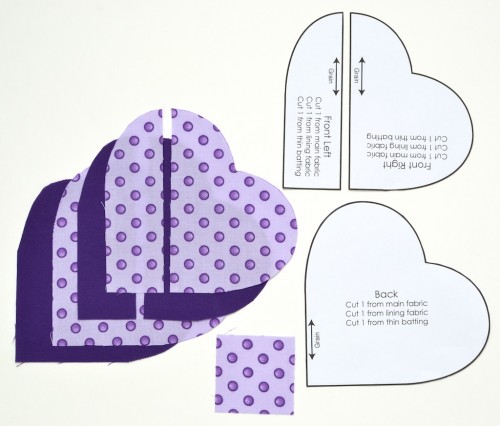
Download the PDF with the pattern pieces HERE. You’ll need:
Four 5″ squares of fabric
Two 5″ squares of batting
One 2″ square of fabric
One nylon zip at least 6″ long (longer is great)
Pay close attention to the grain direction while cutting out your pieces. Following the grain helps the pouch to not get stretched out along the zipper. Make sure you cut the main fabric and lining as mirror images, meaning flip the front templates over to cut the lining.
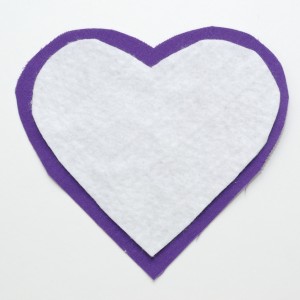
 I cut my batting like 1/4″ smaller around the outside edges.
 Line up the Front Left pieces as shown, with the zipper pull to the left. Place the lining fabric right side up, zipper on top right side up, then outside fabric right side down and batting on top. Sew with a 1/4″ seam allowance. Trim batting out of this seam. (Again, for more detailed photos, see the original post.) Click for a larger photo.
 Then place the Front Right pieces as shown, with the zipper pull to the left. Place the lining fabric right side up, zipper on top right side up, then outside fabric right side down and batting on top. Sew with a 1/4″ seam allowance. Trim batting out of this seam.
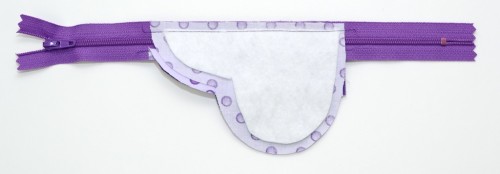 Fold all pieces back away from the zipper and press, careful not to melt that zip. Topstitch.
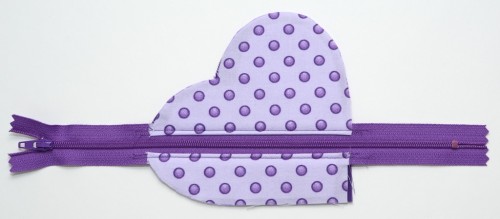 OPEN ZIP HALF WAY. Tack zipper. Press and sew the tab (again… reference the original post). Fold in half, place as shown with raw edges to the outside. Tack in place.
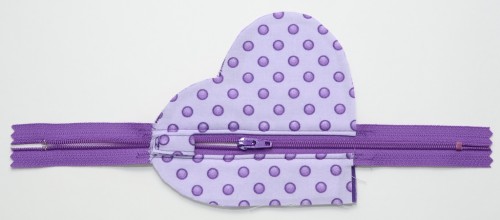 Cut off the ends of the zip (optional, you could do it later). Sandwich the batting and place the sandwich right sides together. Sew around with a 3/8″ seam allowance. Pay attention to the point at the bottom and the curve at the top. Take one or two stitches straight across in each spot before pivoting, as shown. (Click to zoom.)
Clip the seams. Apply fray block to the point, curve and edges of the zipper and overlock the portion where the zipper opens. I made tiny clips at the top curve, but if you do then definitely apply fray block and possibly go back and sew over that curved part of the seam a second time. This is a tricky curve to get flat.
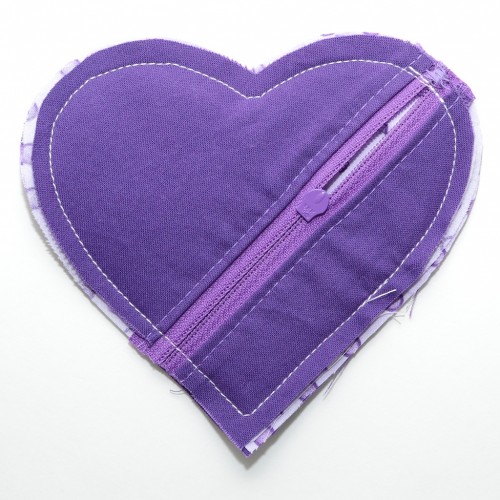
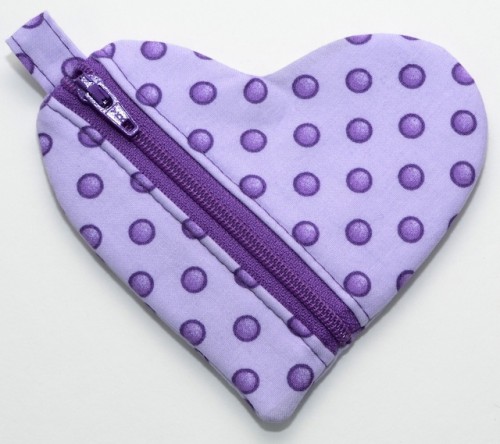
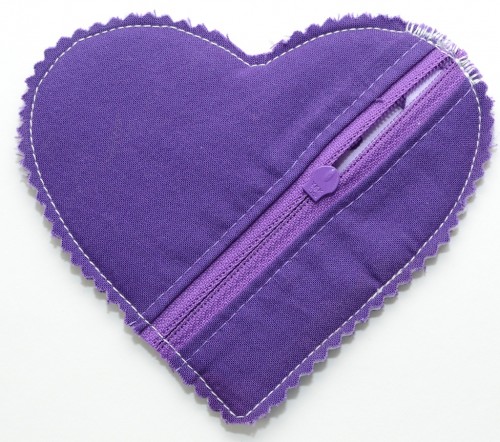 Turn right sides out and press well.

Oh my goodness, how cute is that!! Thanks for sharing :) If you ever need a pattern tester let me know because I love your work!
Cindy
That is adorable! I can’t wait to make one!
Loved making the circle. The heart is so cute! Thanks for the update.
That is so CUTE! Thanks for the tutorial!
Review by art chick for Rating: This pouch is very handy. It is larger than my , so it was a litlte larger than I was expecting. It still fits pretty well in my purse, and it protects the camera very well. I got the green one it looks like is a color I would describe as avocado green in real life.
You are too clever! I can’t tell you how many of the bud cases I made for Christmas and by request!
Yay! I can’t wait to make this version, too!
Thanks everyone for the nice comments! I’m glad you like it!
So cute! thanks so much for the tutorial!
I love it, my friend had made in februari like this but other way look here:https://www.moi-kapelka.nl/1432950/portemonneetjehart-met-hert-woodland she sell a bounch
so pretty! I love this idea that you can keep your heart in the pocket! Or What’s that in your heart?!
Thank you so much for another great tutorial! I just finished a little heart pouch and it turned out great. IMNSHO Your directions and plentiful photos make each step a breeze.
beautiful. we’ll feature you tomorrow afternoon. come pick up your “im featured” badge here: https://www.finecraftguild.com/craft-parties/ to prominently place on your blog. you deserve it. this is really great, and right up our alley! thank you for sharing your tutorial.
I love this tutorial!!! Thank you!! :)
hello , what a nice pouch!
it is really wellexplained . Thank you very much
michele
Erin,
I just made this tonight (I’ve made the circle version several times before), and I have a question. Do the lining half-heart pieces need to be cut with the pattern piece flipped? So that they’re mirrored? I couldn’t figure out how to line them up otherwise, but looking over the tutorial, I’m not sure how to do it without cutting the lining pieces mirrored?
I used a solid color for the lining, but yes if you want to use printed fabric you would want to flip them. Or if you are using one fabric for the inside, just fold the fabric wrong or right sides together and cut two. :)
Thanks. Yeah, it turned out fine once I cut the lining fabric on a mirror image (well, it’s a sad-looking heart thanks to my lack of skill at sewing curves, but it’s still functional).
I made your Two-Zip Hipster a few weeks ago, by the way. Turned out great–extremely well written pattern! Love the functional style, and it’s very durable.
Awww, I really wish I had read the comments before starting this. I never even thought of this and cut out 8 of these last night . . . all with printed linings, and now none of them will work :(
[…] according to Mini Tutorial for Heart Shape Pouch […]
What a lovely n cute pouch.. I’m gonna make one.. thanks for the tutorial dear..
[…] Show someone you love them with this heart-shaped-pouch-mini-tutorial. […]
For lining, did you use felt? That’s what the picture looks like, but I can’t tell 100%.
Super cute! I found this while looking for the circle case. Would this be big enough to hold earbuds as well?
Beatrice <3
I meant, felt for batting, not lining. :)
It’s batting. Pretty sure it’s the super thin Quilter’s Dream Cotton “request” or whatever their thinnest option is. :)
Awesome, thanks! Is this pouch big enough for earbuds, like the circle one?
Yes, my apple ipod headphones fit fine. It’s not as practical (definitely more cute than practical) but they do fit!
wow! So cute…love it.Thanks for sharing!
I made one of these for my daughter to keep her retainer in at school while she eats–keeps it from going accidently into the trash. She hangs it on a lanyard around her neck.
BRILLIANT! :)
Thank you for the tutorial !!! Now i have to improve my english !!!
un grand merci pour ce charmant tuto! il est magnifique et j’espère pouvoir le réussir aussi bien que les tiens! merci pour ce partage et bravopour ton blog! bonne journée!
This is so cute! I saw it on Pinterest, but it wasn’t here on your site. I googled it and found you here. The page Pinterest linked to is https://www.saifou.com/entry/17128.html. Don’t know if you approved it or not, so I’m pinning this page instead of repinning the other.
Thank you! Unfortunately I’ve tried to get that taken down without a lot of luck. I’m so glad you found me!
[…] dame met een peperkoeken hart. Vandaar , het cadeautje!! Toch wel, heb ik zelf gemaakt volgens deze tutorial, in het engels maar er staan voldoende foto’s bij om te kunnen volgen. By the way, deze is […]
I found this on pinterest but had to search for you since the picture links to spam (nextot.com). So glad I found your tutorial. I am excited to have a look around!
j’ai réussi à faire ce joli coeur! un grand merci! il est en photo sur mon blog, je ne sais pas comment t’envoyer cette photo (si tu le souhaites).
Hi. Yeah, I wish I could do something about the spambots. They seem to love this post and even if I can manage to get Pinterest to care, the server hosts are usually outside the US and I can’t do anything about them. :( Thank you for finding me!!
Thanks for this tutorial. I made a few and they are easy to sew; great gifts for friends and kids. Viji
OMG! What a cute little purse, if you like coin purses check out my Facebook page, Elstitch. Thanks for the tutorial, I made them as gift for a reunion with friends, they adored them, thank you! Elise.
These are adorable. I am teaching some girls (ages 8-16) to sew and I think they would love to make these! Is it ok for me to make 5 copies of your instructions? That is the number of girls in the class.
The girls in my sewing class did a great job with the heart pouch! Thanks for very clear instructions and pictures!
love this! I have made over 20 of your circle pouches and came back to send a friend the link and saw this. I have Thank You gifts to make for an event looks like I will be sewing hearts
Hi,
Thanks a lot for sharing. This will be a great gift for holidays although not an expert when it comes to sewing.
Love this! I am making 7 for my craft exchange. One question though – why do you tack the zipper and cut the end off vs. using the zipper stop that is part of the Zipper? Could you use that?
Hi Debbie! The reason I cut off the ends is that when you stitch the pouch, if a needle hits any of the metal bits it will break. That means you have to avoid it twice, on construction and on the topstitch. I always use too-long zippers so I have to cut them down anyway and so far I haven’t found a good reason to keep the original metal parts. :)
Hi Erin,
Someone sent in a lot of these to me recently as I am the coordinator for the tombola at Festival of Quilts in Birmingham UK this year. Having seen your tutorial, please may I post a link to this page on the website so that other people can make them too? We are fund raising for The Quilters’ Guild of the British Isles which is a registered charity. We conserve, we educate and we promote quilting. I have put the link to the tombola website above this message and there is a link on that website to The Quilters’ Guild.
Regards,
Jan
[…] pouch tutorial from Ricky Tims Heart Shaped Pouch Mini-Tutorial :: Dog Under My Desk Have a Sewonderful Day, Mary T. Reply With […]
I love it. It is so cute, I’ll have to make some.
I made one of these awesome pouches as soon as I finished reading the tutorial! I altered it slightly by using a stiff iron- on interfacing in stead of batting so it lessened the bulk. It turned out great! Thank for the tutorial.
Just want to thank you for this pattern and tutorial. I’ve made 2 so far, they are so darn cute! :)
I must have cut my fabric wrong. I had all the hearts the same direction, but when cutting the fabric, the outside fabric has to be cut right side up. The lining fabric has to be cut right side down. Otherwise, when placed right sides together the shapes are opposite of each other.
This IS soooo sooooo sweet!
You r extremely talented!
Hi, thanks for the great tutorial. I made a pink one and it came out so cute.
i have 16 grandchildren and all could use these. hearts for girls, other shapes for boys. great stocking stuffers. at christmas they all expect something made out of feminine material for the girls and camouflage for the boys.haha.
Thanks for this! Made 7 of these as part of attendants’ gifts for a friend’s wedding.
I printed off the Heart Pouch Mini tutorial and didn’t receive the pattern pieces. Can you please help me? Thanks
Hi Karen – you need to print the pieces separately. https://dogundermydesk.com/wp-content/uploads/2012/04/heartpouch.pdf
[…] Heart Shaped Pouch Mini-Tutorial – Dog Under My Desk – I know a lot of you have asked for this heart pouch tutorial and I finally finished it! First, I want to let everyone know that I’ve finished and posted the … […]
Oh my word- this is so cute! I’m running off to make a couple for my daughter to give her teachers tomorrow! Thanks!!
I can’t download the heart zip bag pattern. Help! I love round zip pouch and have made many.
Thanks
[…] also has another tutorial, for a Heart shaped one… I had not tried that one out yet….. but I thought it would be perfect for this […]
Erin, thanks so much! I’ve made many a circle pouch and will be sure to make this one too.
Thank you so much Erin,
Tooo cute!
The beauty of this heart-shaped pouch, its delightful and whimsical design caught me by surprise. As I could see those charming pouches are not just functional but also serve as a heartfelt and personalized gift idea for our loved ones, perfect for expressing love and creativity through sewing. We discover how to create a heart-shaped pattern, work with zippers, and master sewing techniques that are applicable to various patternmaking for fashion design projects.
[…] PATTERN HERE […]
This heart pouch is adorable – perfect little gift that’s as cute as it is useful! Today I’ve featured your tutorial on Crafts on Display, I hope you enjoy it! https://craftsondisplay.com/sewing/heart-shaped-pouch-177787/