
**UPDATE** Make sure you check out the new bonus features included in the pattern!
A few of you discovered I uploaded the pattern last night… :D

I’m really excited about it! You’ll find all the photos, description and materials list on the pattern page, but I’ll give you my highlights.
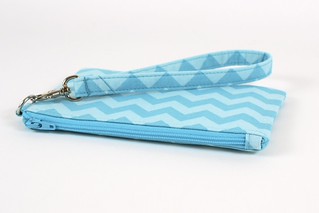
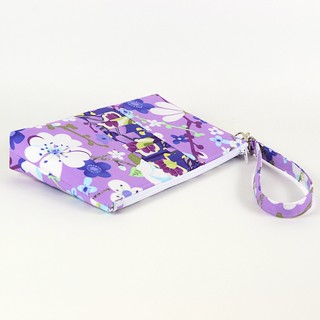
Perfect corners: As usual with my patterns, this is very much technique focused (as opposed to design – I’ll let you add the ruffles and patchwork!) I’ve done all the math and trial and error for you and given you 16 pages of step by step photos so you can achieve that perfect corner. Get your zippers out of the side seams for that wide-open result. Don’t make another dented corner zippered pouch!
Zippers: You’ll need at least 9″ zippers for this, but you can buy them longer so you can use them for purses too. I tend to buy 14″ zips. I highly recommend the YKK zips from Zipit. It’s worth waiting the extra couple of days to not struggle with a Coats & Clark zip from the big box store.
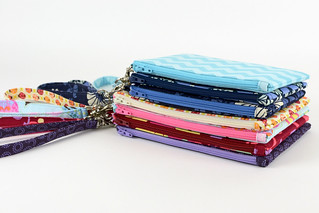
Make lots of them: Once you make one of these and get the hang of it, the easy rectangle shape sews up really quickly. No darts or boxed corners to deal with and the construction is really straight forward. You can reasonably make one of these for everyone on your list and really impress them!

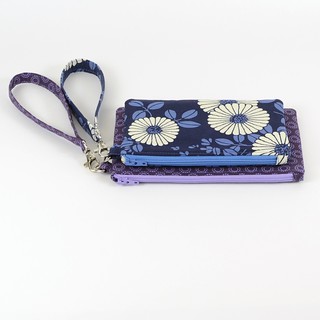
Customize: I made one with boxed corners and a pleated ruffle and one with a back zippered coin pouch. Once you learn how to install the zipper you can go crazy making modifications until it’s perfectly your style. These are NOT part of the pattern, but if there is a huge interest in that back zippered pocket or the boxed corner style, let me know. Neither were exceptionally difficult modifications and I’d be happy to show you.
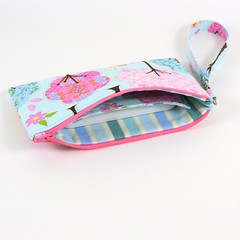

Size & Pockets: The wristlet has two size options and two pocket options. I use the small wristlet with the card pocket as my everyday wallet. It’s perfect for running into the store without my big purse or tote bag. My phone still fits in the main pouch, my debit card stays easy to find and it still fits my chapstick and keys. :) The larger size is perfect for date night or when you need to carry a little bit more, or like me when I went out of town and needed to keep my passport on me at all times.

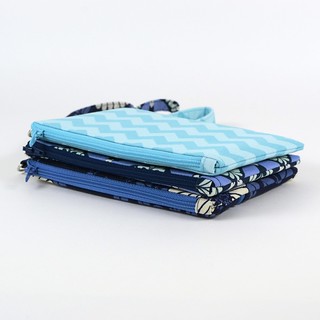
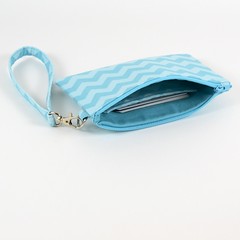
Interfacing: If you’ve ever made any of my patterns, you know I back everything in Pellon SF-101 woven fusible. But also, for this project, I used Pellon 926 as the sew-in interfacing for all of my samples except the blue one with the 2nd zipper, which has Pellon 50. I really love it. It turns easily and the wrinkles press out well. It’s in between Peltex 70 and Pellon 50, and it sews through like a dream and cuts away from the seams really easily and cleanly. I don’t know how easy it is to find 926 (My JoAnn has it.) but if you can’t find it, Pellon 50 works just fine. If you want a similar thick, sturdy feel you can use two layers. One layer will still hold the shape nicely, it just won’t have that substantial-yet-pliable feel. It’s really personal preference. You could even use batting like I did on this one.
That’s it! Any questions? Coming up…. those curvy cross body bags, any wristlet modification tutorials you demand, the no-raw edge pouch, possibly some additional helpful-hints-for-bagmaking posts… and I have LOTS of craziness coming up so I’ve been trying to cross anything I can off the list, which ends up being random stuff like sewing knit skirts and making my fancy shoes pretty while waiting for pattern testers. I’ll hopefully get the raw-edge pouch tutorial up before I go to Canada next weekend (SO EXCITED about that!)
A big THANK YOU to all my pattern testers, readers and all of my friends. You’re all the best. Happy Sewing!
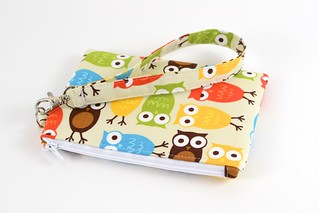
OWLS!! You have a lucky friend, because that wristlet is fabulous ;)
It is clear how much work you put into this pattern; I cannot wait to sew it!
Yes she is very lucky. :P
I bought the pattern last night :-). The directions and pictures are great! I may practice the strap on some scrap material while I’m waiting for supplies I ordered. If I make the outside from home decor fabric and the inside from a quilting cotton weight fabric, I use the SF 101 on the main (home dec) fabric only and use the pellon 50 (1 layer) in step 8 (h,i)? Is that it? what about the pocket – do I need any interfacing there?
Awesome! Thanks! I’m trying to remember what I did on the Outside Oslo one. I think I skipped interfacing on the pocket, but added it to the Kona cotton lining. You could do either. I think it will be OK. :)
I can’t wait to get started!!
I bought one of your sample wristlets and I use it all the time. I have been waiting anxiously for the pattern. I’m going to make these for everyone I know.
You have lucky friends!
I just bought the pattern and love it! I have everything I need BUT the D-rings :( I can’t wait to try this pattern…
I have other patterns in which I’ll use this great tuto… you really explain everything very clearly, Erin.
The other day I ripped apart an old pouch and it was made this way but I couldn’t figure out some of the steps!
Thank you Bea! Can’t you just steal one off of an old bag? The sacrifice is worth it! lol :D
I would really like to see the zipper and boxed corners included with this pattern please! I can do them…but would LOVE to give you complete pattern credit when listing them. ;0) There is plenty of crafty love in this big world for all of us, so if a pattern is available I will purchase and use it rather than ‘knocking off’ something! GREAT WORK…your two zip hipster is my FAVORITE!
I’ll work on it! It’s just going to be quick, if you know what you’re doing you just need the pattern piece and basic instructions. I’ll get it done! :)
Thanks Erin! I forgot to ask for the bonus you offered :)
Yep I will definitely get it done. Seems to be a lot of interest. I stayed up all night writing the no-raw-edge pouch tutorial. You know, like normal people do. :D
I love the pattern and will buy it when I get home tonight. Forgive me if you’ve answered before (I did use the search), what sewing machine(s) do you use?
Thanks!
Thanks! :) I have a Bernina activa 230. It’s 3 years old and Bernina just updated the line with the pretty new silver Bernina 350. :) It’s a pretty good workhorse machine!
Thanks! I am shopping. My current very low end machine is pretty much a paper weight after a six layer project last night ;)
This is the nicest wristlet pattern I’ve seen. That zipper/corner is beautiful!
Thank you!! That really means a lot. I can’t even tell you how much time I spent on it. Thank you thank you!
[…] up if it makes no sense… :) Also this is kind of a thank you for the amazing response to the new wristlet pattern. You all are […]
I finally made my wristlet tonight. The instructions are fantastic, and it came together quite nicely. I’m inspired to make a few million more. Thanks so much for putting together the tutorial!
Thank you! Did you post photos yet? Let me know when you do, I’ve only seen a handful so far and I can’t wait to see them all!!! :D
I really love your patterns! I just started sewing earlier this year and your patterns are perfect for me. I just finished my wristlet this evening – i think i know what my girlfriends are getting for christmas :) I would love to see detailed instructions on how to do the box corners. Thank You!!!
Such a detailed pattern – thank you! I bought it so I could make the wonderful police box variation for a friend. My wristlet had a twist – but isn’t a Mobius strap sort of right for the Tardis? It all went wonky but I am ready to try again. My daughter and I both love your tutorials. Thank you!
Thanks! I know the strap can be tricky, but it’s SO worth it when you don’t have to sew through four layers of strap and still see bits of raw edge. I’d give it another try. I’m sure you will get it!
Could you please tell me if there are any raw edges inside this pouch? I’m looking for a pattern for a pouch with perfect corners but I also don’t want any raw (or bias strip covered) edges inside it? Thanks
It’s completely finished! No raw edges. Turned through an opening in the lining. :)
Hi! LOVE your patterns and I am going to purchase the wristlet pattern but have been looking for something with the double zip so I would be interested in seeing the addition and would have absolutely no problems in purchasing the add ons as I can only imagine how much time is spent creating such clear instructions like the ones you create!
Hi! Thank you! Actually this post is really old, I added the bonus features a few weeks later to the pattern so you will have them included. :)
Of course, I purchased after I wrote this comment and noticed that it was included. I said to myself that I should have read the pattern more carefully before writing but I always seem to do stuff like that. Looking forward to working on the wristlets and hopefully I can get the double zipper portion done right :-) I really do love your patterns though. They are perfect for me since Im more of a visual learner. When there is nothing but text, everything seems to blend together.
[…] up if it makes no sense… :) Also this is kind of a thank you for the amazing response to the new wristlet pattern. You all are […]