
 First I sewed the band onto the pillowcase. Then, before sewing the side seam, I folded it in half to decide how big the letters should be. I chose a fun font and made the letters size 350. When printing letters for applique, you should mirror the image. My printer settings have a “flip horizontal” option, so use that if you have it!

 Using Heat & Bond Lite, Steam a Seam Lite, Wonder Under or something similar (just make sure it’s the SEWABLE version) trace the letters onto the paper side of the fusible web. Cut out the letters leaving about 1/4″-1/2″ around the outside.
 Fuse the letters onto the wrong side of the fabric. I used a Kona Cotton fat quarter. Cover with a press cloth if you don’t want pencil all over your iron! The fusible web will come with instructions, but I just use a hot, dry iron and lift and press… just a couple seconds on each spot. Practice on a scrap if you’ve never done this before. You’ll see the paper change color and get darker and the bubbles will smooth out.
  Now let it cool and then cut out the letters along the traced lines. Don’t forget the middle of the letters! Then carefully peel off all of the paper. If the corners don’t easily peel away, leaving the glue behind, you might need to press them again.
  Move the pillowcase to the ironing board. Line up the letters (use the ruler if you need to) and get them exactly where you want them. Don’t forget to account for the seam allowance on the raw edge side. Since I use a french seam, I left an extra 3/4″ seam allowance on the right (raw) edge. Now PRESS the letters down really well. First I carefully lift and press to set them, and then I go over it again with tons of steam!
  Now take it over to the machine and set it for a basic zig-zag or satin stitch or even a decorative stitch. You just want to cover the edges so that it doesn’t fray and it reinforces the hold from the glue. You could even use a straight stitch! I like to use a short, wide zig-zag stitch. Practice first on some scraps until it looks “right” to you!
For extra stability, I use tear away stabilizer that’s normally used for embroidery. Just place it on the back side of the letters before sewing them down. It keeps the stitches from puckering and pulling through or ripping the fabric, since they are so close together.
Sew around ALL of the letters. Make sure your needle is down when you pivot around the corners. Leave your thread tails long at the beginning and end instead of backstitching. Try to start in the middle of a letter, not at a corner. When you come back to the beginning, sew over the part you already stitched just 2-3 stitches. Then pull the threads to the back and tie them off: Flip it to the backside of the letters and find the bobbin thread. Give it a little tug. A teeny tiny loop will start to pull up.
  Use something dull (closed scissors or a turning tool are good) and pull up that loop.
 Tie these off with a good double or triple knot. Use Fray Block on the back side if you’re worried about it coming loose.
  Now for topstitching I would thread these into a needle and bury them in the fabric, but this is the back side so I just trim them close, but not too close!
  Now go give it a REALLY good press to set the stitching!
 Carefully tear away all the stabilizer. I find it’s easy to tear it away, but be careful to not put stress on the stitches. Go slowly and tear away a small amount at a time. Don’t forget the middle of the letters! Just do the best you can. To save time, you can find wash away stabilizer that dissolves in water.
 Now give it another good press! This is when I french seam the two open sides. Line them up with the WRONG sides together (so the right sides are out), and sew both open sides with a 1/4″ seam. Then turn everything inside out, so it’s all right sides together. Roll those seams all the way to the outside and press really well. A turning tool can be helpful for this, just make sure not to use anything to pointy with flannel or it will put a hole in the loose weave. Then use a 3/8″ SA to sew around the whole thing again, encasing the original seam. Turn it back right side out again and check to make sure the seams are all enclosed. Press it really well again, and you’re done! Now give it to your little one so she can take a nap!
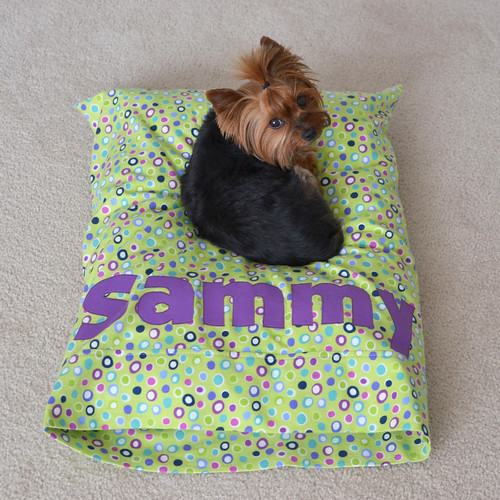
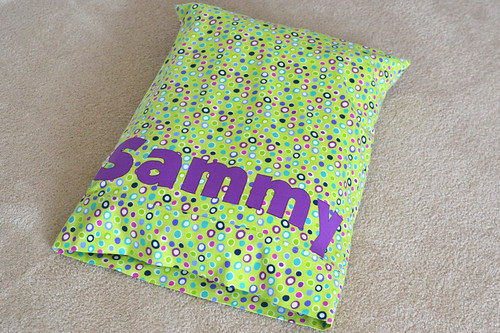
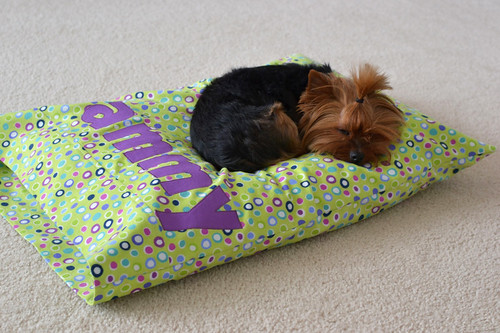
Oh wow, super easy to follow!! I just stumbled across this as I was looking for applique tutorials. I’m also a dog crafts/tutorials blogger so glad to have found you!!
xoxoxoxo,
Erika and Sebastian
Thanks for this “mini” tute. I am going to be doing some applique soon and needed to brush up on my technique. You’ve helped!! Thanks!
My grandma lived right down the steret from us. I used to ride my bike to her house every day after school. If my mom couldn’t find me, she knew where to look.I remember, when my grandma was getting older and her eyesight was going, that she liked to do handsewing. I don’t remember what she was sewing, but every afternoon I would go to her house and thread about 50 or more needles for her, and line them up for her to use. The next day she would sew, and that evening, I would go and thread them all again. Ohhh. Now I really wish I knew what she was working on every day. I was only about 10, and for some reason, that wasn’t important to me. I just loved knowing I was helping her. She died when I was 18, and I missed her so bad for the longest time.
I used that same video to make some pillow cases for Christmas. I also added on applique letters for “Noel” and “Joy.” Now I HAVE to make one for my Westie, Walker. She definitely needs personalized pillow case. :)
I just found your blog today- love!
That is sew cute and you did a great job explaining. Thank you :)
[…] of fusible web that has been ironed on the fabric. (There are several tutorials for this method. HERE is a good one!) Cut the letter out, then follow the same directions to sew it to the […]
The link to The Missouri Star Quilt Company for the “Tube Method” does not work.